When you're invited to a BBQ at John and Rachael's place - where the ribs are always excellent and the grilled haloumi plentiful - the appropriate response is always "what can I bring"? I short-circuited the inevitable counter response of "nothing but yourself" by asking "what can I bake" instead.
The answer - pie! And just when isn't pie the answer?!
John kindly sent me a list of pie fillings he'd personally like to try and I chose "sour cherry". The pumpkin pie and strawberry and kiwi fruit pie will have to wait until further invitations are forthcoming...
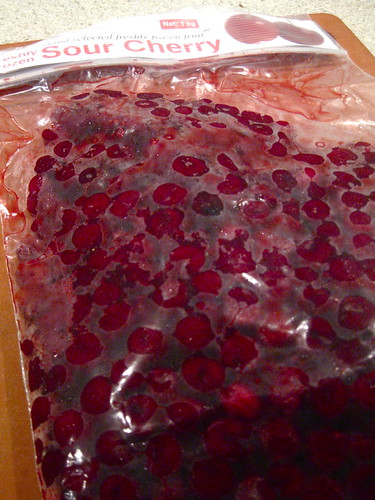
Now, sour cherries are not something I was terribly familiar with. All the recipes in my many American baking books called for fresh sour cherries, which apparently have a tragically short season. Seeing as it was autumn (not exactly cherry season in Australia) and that I had never seen sour cherries sold at any of the many markets I traipse about at regularly, I had consigned myself to using tinned sour cherries. Now, this is not ideal as cherries preserved in syrup are a whole lot more watery than the cherries called for in my recipe books, and I was pretty sure this could make a big difference in the outcome.
Thankfully my local European deli came to the rescue with frozen sour cherries - and if the final dish was anything to go by, it was well worth the running around to find them.
I stuck very faithfully to the Martha Stewart Cookbook recipe for sour cherry pie, seeing as this was my first pie-making venture. I also told myself repeatedly that I was going for "rustic" and not "Martha-perfect" and, with that in mind, I was very happy with the result. The pastry was tasty and flaky, the filling just the right amount of sweet-and-sour and it all went down very well with a big scoop of vanilla ice-cream.
So thank you, John and Rachael, for providing me with the motivation and the inspiration for trying something a little out of my comfort zone!
Sour Cherry Pie
Ingredients
Pastry
- 2 1/2 cups plain flour
- 1 teaspoon salt
- 1 teaspoon white sugar
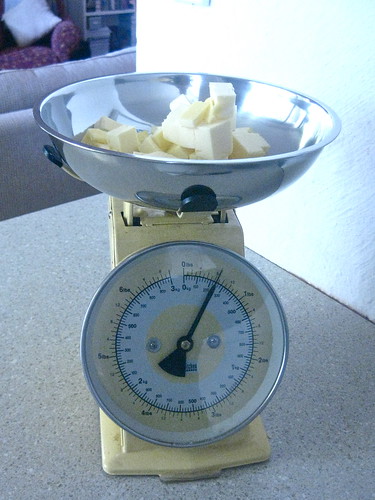
- 1/2 pound cold unsalted butter, cut into cubes
- 1/2 cup ice water
Pie filling
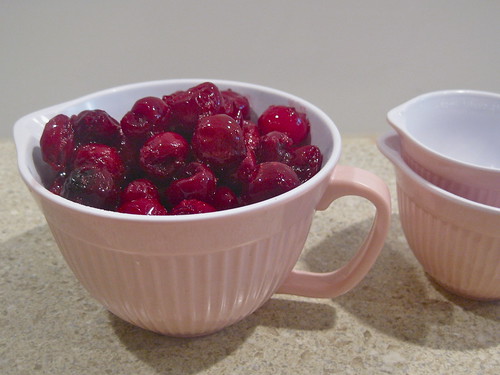
- 4 cups pitted sour cherries (fresh or frozen), plus 1/2 cup left over cherry juice
- 1 cup white sugar
- 1 tablespoon plain flour
- 2 1/2 tablespoons of cornflour
- Juice and zest of 1/2 lemon
- 2 tablespoon cold unsalted butter, cut into small cubes
- 1 egg beaten with milk or cream
I kicked off first thing in the morning by setting up my food processor and making the pastry, which required at least an hour in the fridge before I could roll it out for the pie. Once the processor was set up, I added the flour, salt and sugar into the bowl. The butter, cold straight out the fridge, went in next and then I blitzed it with the processor until it looked like course meal (you can do this by hand with a pastry blender, but I was a little pressed for time).
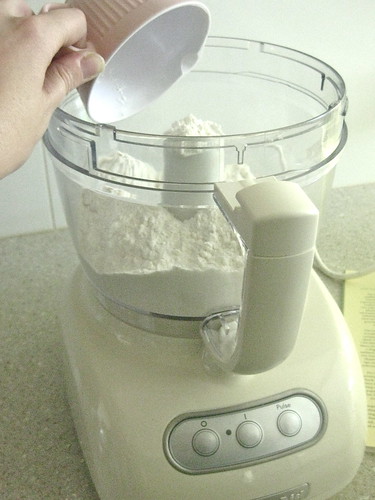
Next I added the cold water while the processor was going, one 1/4 of a cup at a time, until it formed a rough ball in the processor bowl. You don't want to do this too long, because it will make the pastry tough. It really should take no more than 1/2 cup of ice water, so don't keep adding more. You don't want the pastry to be too wet and sticky.
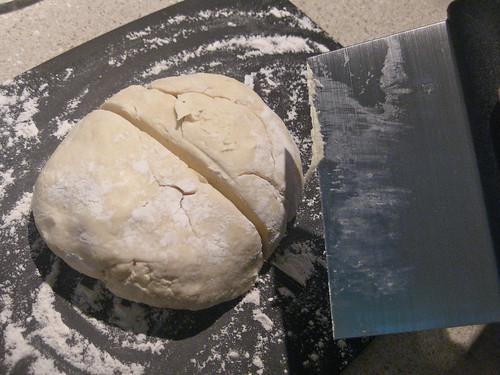
Now lay some cling wrap on your bench and scoop out the pastry onto it. Roll the pastry into a round ball and cover in cling wrap tightly. Pop it in the fridge for at least an hour, maybe while you go to the market for the cherries (that's what I did).
When you are ready to make the pie, firstly preheat your oven to 200 degrees Celcius (400 F). Now, divide your pastry in half and roll out one of the halves on a floured surface - I used a large wooden chopping board for ease of cleaning up. Use a pastry roller but don't forget to pop some flour on it so that it doesn't stick. The pastry should be rolled out to approximately 1/4 cm in thickness. Drape this over a 9 inch pie dish or pan. Cut off the edges so it matches the shape of the dish.

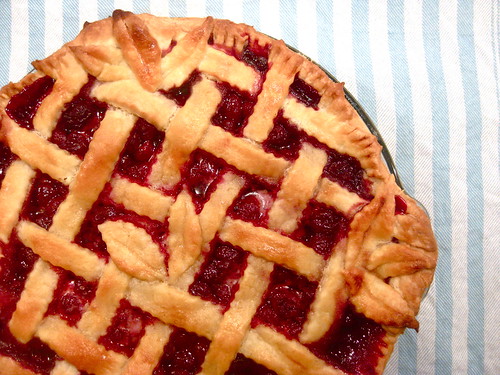
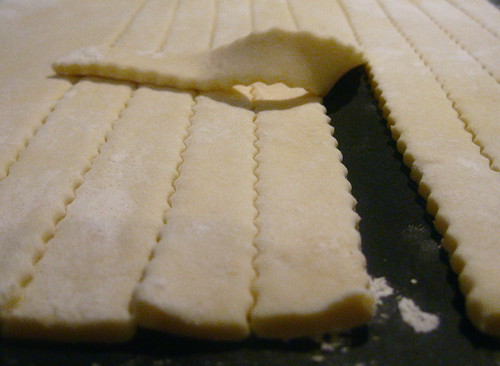
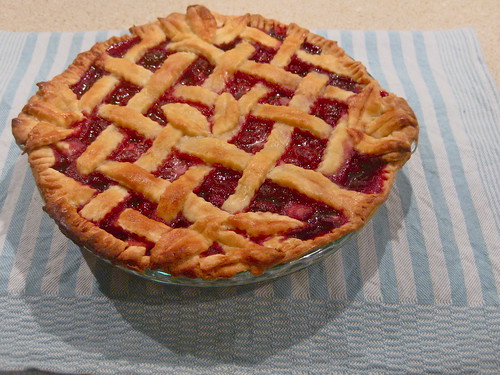
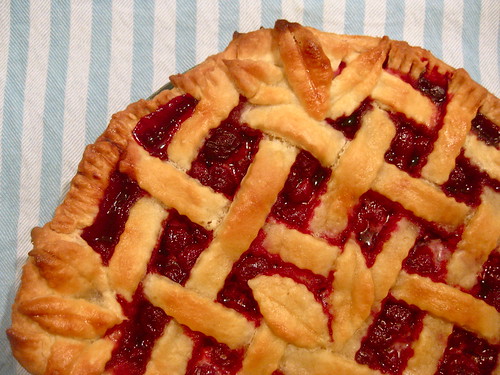
Next, roll out the other half of the pastry to the same thickness. I suggest a lattice top for this pie (or rather, Martha does), so I used a ravioli cutter - which produces lovely wavy edges - to cut the pastry into long strips about 1 cm thick. A knife would also be fine, but you'll get straight edges. Then, with the excess pastry, I cut up some leaf shapes and used the back of a knife to put a line through the middle of them to look like the centre vein in a leaf. Schmancy, I know.

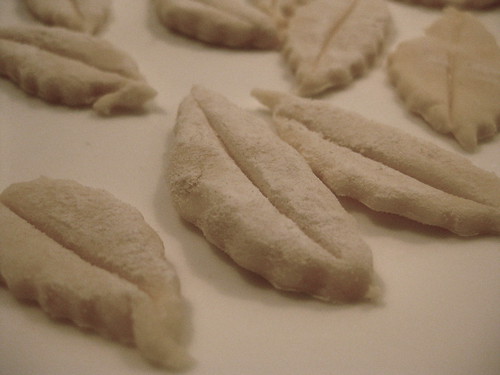
I then covered the pie plate lined with pastry with cling wrap and popped it in the fridge to rest (again to avoid a tough pastry). I placed the lattice strips and leaves on a baking tray I had lined with baking paper (so the pastry didn't stick) and covered it with cling wrap too. Again, this also went into the fridge for the pastry equivalent of a nanna nap.
Now it was time to tackle the filling. I put the cherries in a large mixing bowl and added the sugar, lemon juice and zest, flour and cornstarch, stirring through until the cherries were evenly coated. I poured this into the now chilly pastry case and dotted the top with little squares of butter.

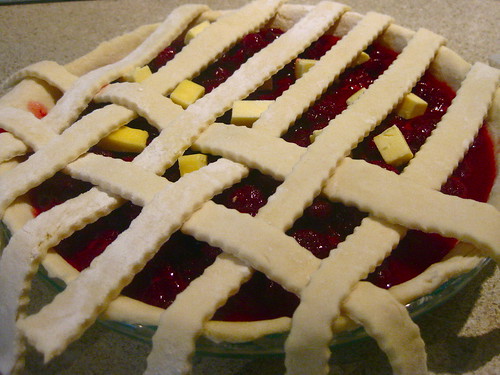
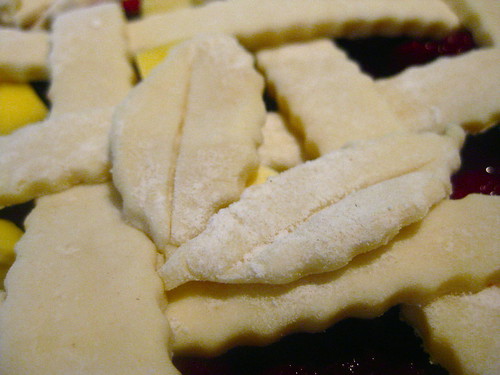
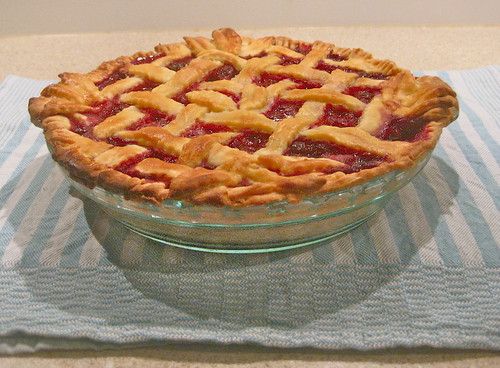
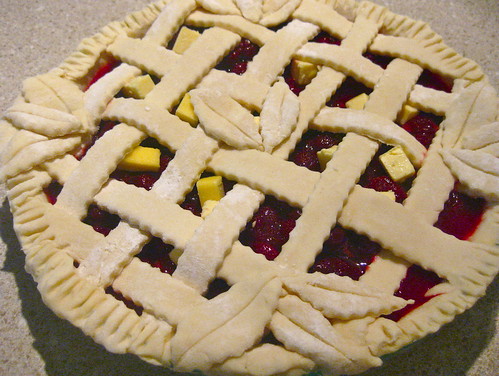
The strips of pastry are then "woven" over the top of the cherry filling - you put your first strips down in one direction and then "weave" your other strips in the other direction alternately over and under the other pieces. Have a good look at the picture of my pie and you will get the general idea. I pinched the sides of the pie to help the lattice adhere to the edges, and then placed the leaves in bunches around the pie. All of the pastry then got brushed with the egg-milk wash, and it was into the oven for around 50 minutes, by which time the pastry had turned a golden brown and the filling was bubbling ever so slightly in the centre.
Even if you want to eat the pie hot (which I personally prefer), I suggest waiting a good 15 minutes at least for the filling to firm up a little before you slice. And if the filling is a little runnier than Martha's directions would suggest, forget about it. Ladle on the vanilla ice cream and get stuck in - it's pretty damn delicious.
omg this looks like one of those pies in the movies! Amazing!!
ReplyDelete